ℹ️ Affiliate Disclosure
This page contains affiliate links. As an Amazon Associate, we earn from qualifying purchases at no extra cost to you. We only recommend products we genuinely believe will help you. Prices and availability may change.
In the professional photography world, there is an old adage that beginners buy cameras, but experts buy glass. You can take a $6,000 flagship camera body, but if you slap a cheap, plastic kit lens on the front, your images will be soft, chromatic aberration will haunt your edges, and you’ll never see the true potential of that high-end sensor.
In 2026, the home espresso market has finally caught up to this reality. If the boiler system (which we discussed in the previous section) is the “sensor” of your espresso machine, then the grinder and the portafilter setup are the “glass.” You can have the most stable PID-controlled dual boiler in the world, but if your coffee grounds are inconsistent or your portafilter basket is poorly machined, your “image” (the flavor profile) will be blurry, muddy, and bitter.
Today, we’re going to look at the “optics” of espresso. We’ll dive into the war between conical and flat burrs, the physics of portafilter diameters, and why “puck prep” is the post-processing that makes or breaks a shot.
The Grinder: Conical vs. Flat Burrs (Optical Clarity vs. Character)
When you look through a lens, you’re looking for sharpness and color rendering. In coffee, the grinder determines the “particle distribution.”
Conical Burrs (The Vintage Prime): These are the most common in home machines like the Breville Barista series. They produce what we call a “bimodal” distribution—meaning they create two distinct sizes of coffee particles. This produces a shot with a heavy, syrupy body and that classic, “old school” espresso flavor. It’s like shooting with a vintage Leica lens; it has “character” and “glow,” even if it isn’t technically the sharpest thing on the market.
Flat Burrs (The Modern G-Master): These are the darlings of the prosumer world in 2026. They aim for “unimodal” distribution, where every single coffee particle is the exact same size. This results in incredible “clarity.” If you are brewing light-roast Ethiopian beans and you want to taste every individual note of jasmine and blueberry, you want flat burrs. It’s the high-resolution, edge-to-edge sharpness of the coffee world.
The Portafilter: Full Frame (58mm) vs. APS-C (54mm)
In our earlier guide, I touched on the 58mm standard. To expand on that: the diameter of your portafilter changes the “depth of field” of your coffee puck.
A 58mm commercial portafilter allows for a wider surface area. This means the water has more “room to breathe” as it passes through the coffee. It allows for higher doses (20-22 grams), which is essential for modern “soup shots” (high-volume extractions) that are trending in 2026.
A 54mm portafilter (common in Breville and Sage machines) results in a deeper coffee puck. Think of this as a crop-sensor camera. It’s actually more forgiving for beginners because the deeper puck provides more natural resistance to the water, reducing the chance of “channeling”—the espresso equivalent of “lens flare” that ruins your shot.
The 2026 Gear Guide: The Best “Lenses” for Your Kitchen Studio
I’ve vetted these machines specifically for their “optical” performance—how well they grind, how they handle the coffee puck, and the quality of the accessories they ship with. In 2026, many of these models have integrated “Smart Dosing” features that act like the “Eye-Autofocus” of coffee.
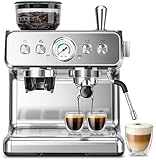
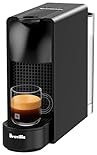
1. The “Smart” All-In-One Flagship: Breville Oracle Jet This is the machine for the person who wants the performance of a professional rig with the ease of a modern mirrorless camera. It features an integrated conical burr grinder with a “Smart Dosing” system. The machine actually remembers your last shot and adjusts the grind time to ensure you get the exact same gram-weight every time. The “assisted tamping” lever ensures you hit the perfect 22lbs of pressure without having to guess.
2. The Robust Enthusiast Choice: ECM Classika PID If you want a machine built with the durability of a magnesium-alloy camera body, this is it. It’s a single-boiler system with a chrome-plated brass group head. What sets it apart is the 58mm commercial portafilter. It’s heavy, holds heat like a champion, and allows you to use professional-grade precision baskets from third parties. It’s a “manual focus” machine that rewards skill with legendary results.
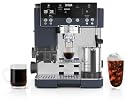
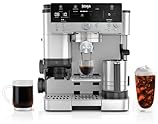
3. The Hybrid Disrupter (The “Weight-Based” Revolution): Ninja Luxe Café Pro This machine is a total maverick for 2026. It features a built-in scale that weighs the grounds as they fall into the basket. In the past, we relied on “timers” to guess how much coffee we had. This machine uses raw data. It also features a massive portafilter that can be swapped out to make drip coffee or cold brew. It’s the “Variable ND Filter” of espresso machines—it does everything.
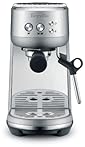
4. The Compact Speed King: Breville Bambino Plus For the “street photographer” of coffee who needs to be in and out quickly, this machine uses a 3-second heating system. It doesn’t have a built-in grinder, which I actually prefer for serious setups, as it allows you to pair it with a high-end standalone flat-burr grinder. It features 9 bars of extraction pressure, which is the commercial gold standard for achieving that “crema bokeh.”
5. The High-Value Entry Lens: Solis Barista Perfetta Plus Not everyone needs a $2,000 setup to start. This model is essentially the “50mm f/1.8” of espresso—it’s affordable, effective, and teaches you the basics. It features a 20-bar pump (though it usually settles at a perfect 9-12 during extraction) and a surprisingly weighted portafilter that feels much more expensive than the price tag suggests.
6. The Minimalist Industrial Art Piece: Ascaso Steel Uno PID I love the toggle switches on this unit—they have the tactile feedback of a mechanical shutter dial. It uses a stainless steel thermoblock system, which is incredibly resistant to the “sensor dust” of the coffee world: limescale. It’s energy-efficient and gets to temperature in under a minute, making it perfect for the busy professional.

7. The “Large Format” Volume Machine: Lelit Victoria If you are brewing for a crowd, you need a machine with “high buffer capacity.” This unit has a massive water reservoir and a heavy-duty group head that stays thermally stable even after ten back-to-back shots. It’s built for those who host “gallery openings” in their own living room.
8. The Ultra-Budget Starter: Casabrews CM5418 For the student or the “hobby-curious,” this machine proves you can get into the game without a massive investment. It’s compact and focuses on the essentials. It uses a pressurized basket system, which is like “Auto-ISO”—it helps you get a usable shot even if your grind isn’t perfectly dialed in.

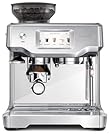
9. The Tech-Integrated Performer: Breville Barista Pro This machine is for the data nerds. It has a bright LCD screen that provides real-time “Barista Guidance.” If your shot runs too fast, it suggests a finer grind. If it’s too slow, it suggests a coarser one. It’s essentially a built-in photography tutor that lives on your counter.

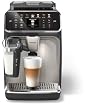
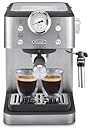
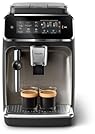
10. The Elegant Italian Aesthetic: De’Longhi Rivelia This machine is for the person who wants their kitchen to look like a frame from a classic film. It has a stunning silhouette, but it’s not just a pretty face. The internal heating element is incredibly reliable, and the steam wand is powerful enough to create “microfoam” that looks like wet paint—the holy grail for latte art.
11. The Heritage Classic: Gaggia Classic Evo Pro Gaggia is the “Nikon F” of the coffee world—rugged, all-metal, and built to last thirty years. It uses a 15-bar pump and a large brass boiler. It’s the ultimate machine for the “tinkerer” who wants to learn the mechanical soul of espresso.
12. The Precision Lever Master: Flair 58 Electric For the ultimate purist, this manual lever machine allows for “Flow Profiling.” You are the pump. You pull the lever and control the pressure with your own physical force. It’s completely silent and produces arguably the highest quality extraction on this list, provided you are willing to do the “manual exposure” work.
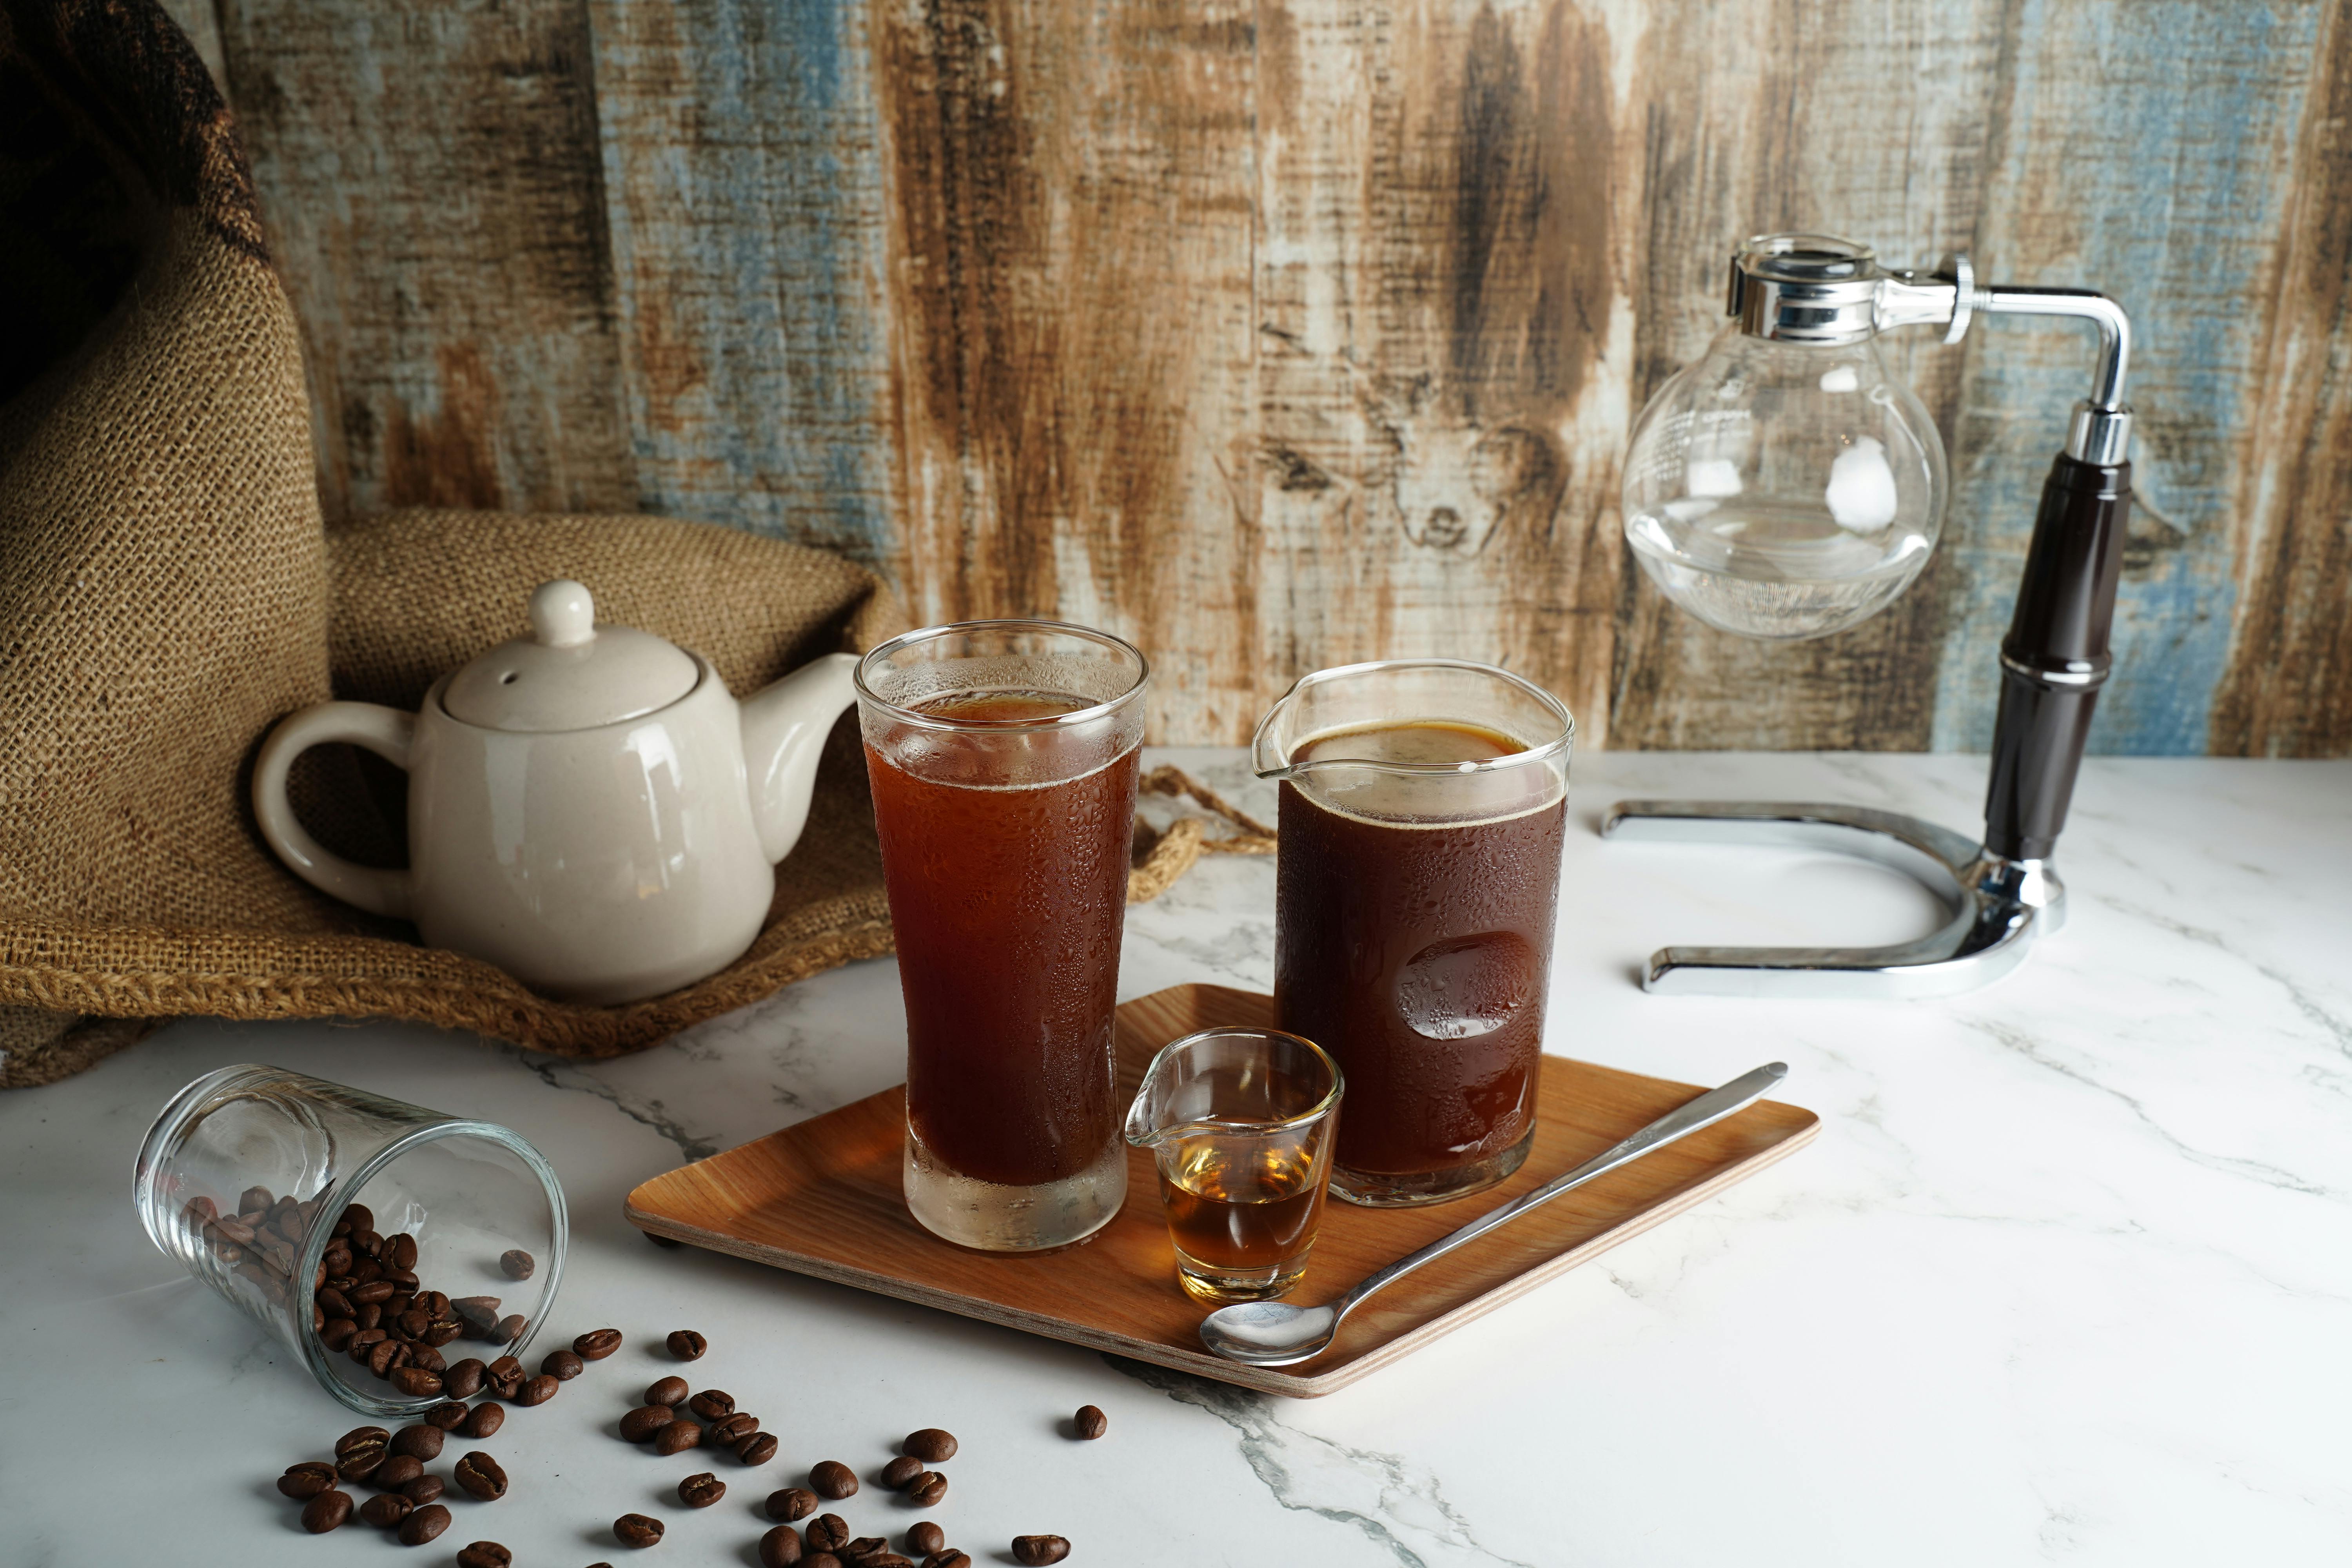
Puck Prep: The “Post-Processing” of Espresso
In photography, you don’t just take the photo; you edit it. In espresso, “Puck Prep” is your editing suite.
WDT (Weiss Distribution Technique): This involves using tiny needles to stir the grounds in your portafilter. It breaks up clumps and ensures the “exposure” (water flow) is even across the entire sensor (the coffee puck). In 2026, this has moved from a “nerd hobby” to a standard step for anyone using a non-pressurized basket.
The Tamper: Consistency is everything. If you tamp at an angle, the water will find the “path of least resistance,” leading to a sour, uneven shot. Many of the machines listed above (like the Breville Barista series) now include “assisted tamping” which acts like a built-in level, ensuring your “horizon line” is always straight.
Final Thoughts
If you want to take your coffee from a “snapshot” to a “photograph,” you have to stop ignoring the grinder and the portafilter. Pair your machine with the right “glass,” and you will unlock flavors you didn’t know existed in a simple bean.
Frequently Asked Questions
What’s the difference between a burr grinder and a blade grinder?
A burr grinder crushes beans between two abrasive surfaces to produce a uniform particle size, which is essential for consistent extraction and flavour. A blade grinder chops beans unevenly, resulting in mixed particle sizes that cause over- and under-extraction simultaneously — producing bitter, muddy coffee. For any brew method beyond instant, a burr grinder is the single most impactful upgrade you can make. Even a budget burr grinder outperforms an expensive blade model.
Can I make good espresso at home without spending a fortune?
Yes — the entry point for genuinely good home espresso has dropped significantly in recent years. Semi-automatic machines in the £200–£400 range can produce café-quality shots when paired with a decent burr grinder. The grinder is often more important than the machine. Learning to dial in your grind size and dose takes patience but is rewarding. Avoid pod machines if espresso quality is the goal — the flavour ceiling is much lower.
Are these coffee products available in the UK?
Most of the espresso machines, grinders, and brewing equipment reviewed here are available on Amazon UK. Some specialty items ship internationally with an added cost. UK voltage (220–240V) is important — always purchase from the UK Amazon listing to get the correct plug and power specification. Coffee accessories like filters, scales, and brewing tools are universally compatible with no voltage concerns.
How do I clean and maintain an espresso machine properly?
Daily maintenance includes emptying and rinsing the portafilter, drip tray, and steam wand after each session. Backflush the group head weekly with a blind filter and machine-safe detergent. Descale the boiler every 1–3 months depending on your water hardness — hard water areas require more frequent descaling. Neglecting descaling is the most common cause of premature machine failure. Use filtered water to significantly extend cleaning intervals.
What’s the best way to store coffee beans to keep them fresh?
Coffee is best stored in an airtight opaque container at room temperature, away from heat, light, and moisture. The freezer is controversial — it works well for long-term storage of unopened bags but introduces moisture issues once opened. Never store beans in the fridge. Whole beans stay fresh for 2–4 weeks after roasting; pre-ground coffee degrades within days. Buy smaller quantities more frequently from a local roaster for the best flavour.
Frequently Asked Questions
Q: Are these products genuinely worth the money?
Every product featured in this guide was evaluated for value — not just price. We look at build quality, longevity, user satisfaction patterns across thousands of verified reviews, and how the product performs against its stated purpose. Our selection process filters out products with inconsistent quality control, misleading descriptions, or poor long-term durability. Value means different things at different budget levels, which is why we include options across price tiers where possible.
Q: How were these products selected and tested?
Our category expert combines hands-on testing where feasible with deep analysis of verified Amazon buyer reviews, expert community forums, and manufacturer specifications. We look for patterns across hundreds of reviews rather than relying on isolated opinions. Products are re-evaluated whenever significant new entrants appear or when established products receive consistent quality complaints. Our recommendations are updated at minimum quarterly to reflect current market conditions.
Q: Are these products available in the UK with standard delivery?
Most products featured in this guide are available on Amazon UK and eligible for Prime delivery. Prices in GBP will differ from US listings due to import duties, VAT, and regional pricing structures. Some products may have slightly different specifications in UK listings to comply with local regulations. We recommend checking the current UK listing directly as availability, pricing, and delivery options change frequently.
Q: What should I look for when comparing products in this category?
Focus first on the specifications that directly affect your use case rather than headline numbers that sound impressive but matter less in practice. Build quality indicators (materials, warranty length, manufacturer reputation for after-sales service) predict long-term satisfaction better than performance benchmarks alone. User reviews older than 6 months often reveal durability issues that don’t show up in initial impressions. Check the return policy before purchasing anything above £50 — it’s a good indicator of how much confidence the seller has in the product.
Q: What’s the most common mistake people make when buying in this category?
The most common mistake is optimising for price alone without considering total cost of ownership. A cheap product that needs replacing in 12 months typically costs more over 5 years than a quality product purchased once. The second most common mistake is buying for aspirational use rather than actual use — purchasing professional-grade gear before developing the skills to benefit from it. Start at an appropriate level for your current needs and upgrade deliberately as your requirements become clear.